Computer building can be very easy
It’s almost like adult LEGOS
Higher end computers tend to have more RGB and lights to show off their high price components.
April 17, 2020
With most of the country tasked to stay home, businesses and schools are taking to a work-from-home strategy. This solution brings the demand of computers to an all time high.
The Chromebooks that are supplied by the SFSD were not built to withstand the large Zoom meetings teachers are providing. The laptop CPU simply can’t keep up with over 20 student’s video screens all at once. This tends to slow down the application and mess up the audio when someone speaks. A solution that one could look into is completely building a computer or PC.
While some shudder at the thought of building a PC, it isn’t as daunting as it may seem. Instead, it’s more like building LEGOS.
In the time that school has been out, I have been collecting parts and building a whole computer. This computer cost me a total of $525, which is on the cheaper side of PC building. A computer has seven main components: the central processing unit (CPU), motherboard, memory, storage, video card, power source and a case to keep it all in. Below is a picture of all the parts in this build.
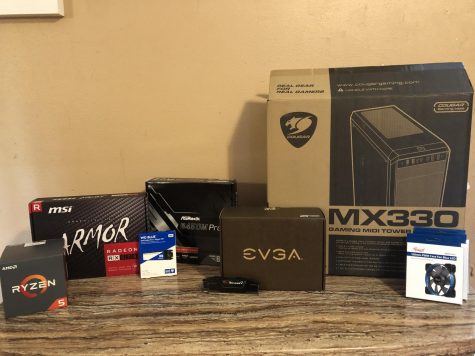
Almost all of my components were brand new with the exception of a used graphics card.
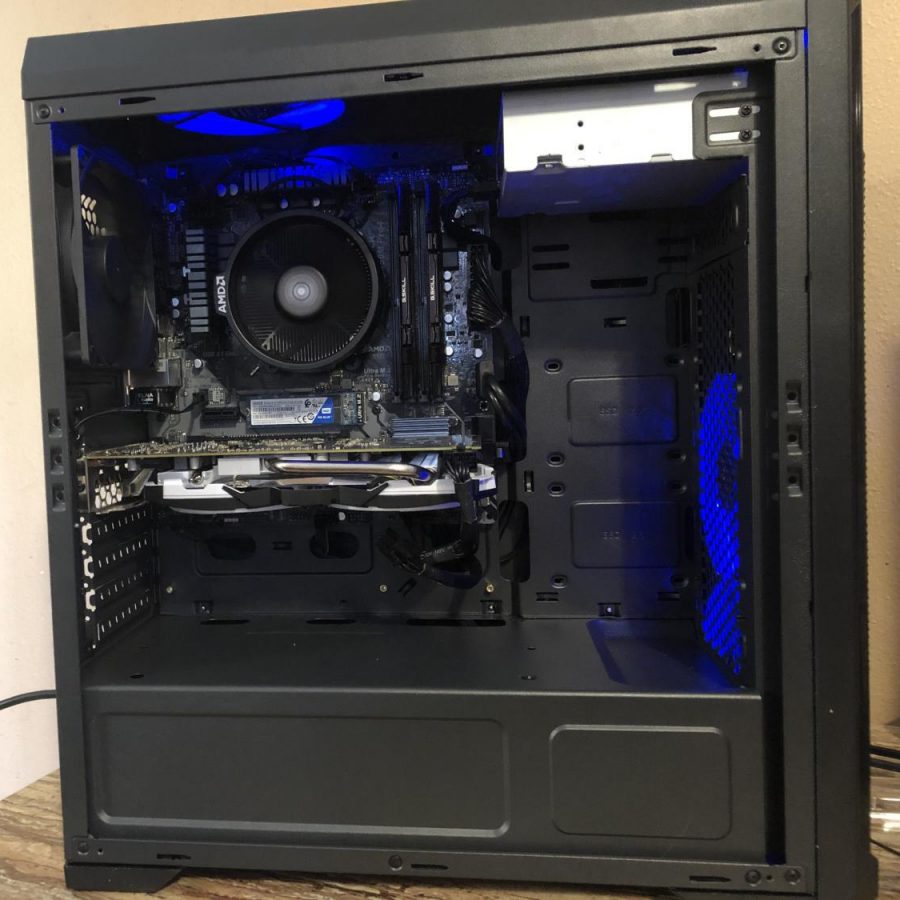
I first started by assembling everything onto the motherboard.
- This included placing the CPU in the bracket and closing it in. On top of the CPU, I screwed in the CPU stock fan that came with the CPU.
- Next to the CPU, I installed the two sticks of ram into two of the four slots.
- Below them, I inserted and screwed in my storage: a 512 Gb M.2 drive SSD.
- After almost everything was installed on the motherboard, I screwed it into my case.
- Once in the case, I can installed the graphics card into the PC.
- With almost everything in the case, I screwed in my three light up fans. Before I put in my power supply, I wired up all these fans to the motherboard.
- With the computer in the home stretch of being built, I placed the power supply into the shroud under all the other main components. I took the cords of the power and started plugging in the power cords. There were three main cords that needed to be plugged in: A 24 pin motherboard cable that will power almost everything in the computer, an eight pin cable for the CPU and an eight pin for the graphics card.
- With only a few more minor things to plug in, I finally had a computer.
- Once all the hardware was assembled and the PC booted, all I needed to do was take a flash drive and download a Windows 10 installer on it, and boot the computer with the flash drive in a USB drive.
- With that installed, the computer is complete.
Building a computer has been very rewarding. It gave me something to do while I have been at home and now I have a computer that can handle large video calls for my classes.